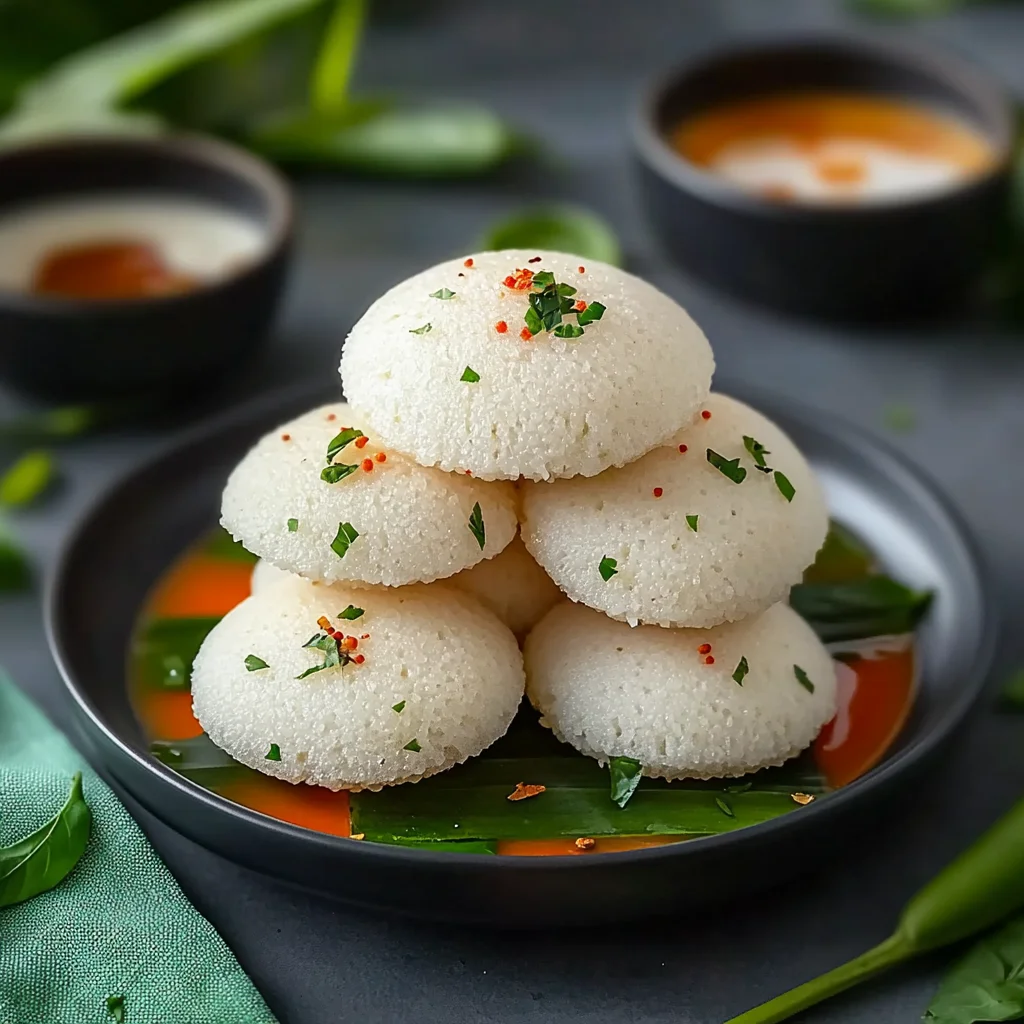
Imagine waking up to the enticing aroma of fluffy, steaming Instant Rice Idli wafting through your kitchen, each bite a delightful blend of soft texture and savory flavors that dances on your palate. This dish is not just breakfast; it’s a warm hug on a busy morning, promising a quick and healthy start to your day that you’ll absolutely adore.
Every time I savor these little rice cakes, I’m transported back to my childhood, where family gatherings revolved around fresh idlis served with zesty chutneys and sambar. Whether you’re rushing out the door or enjoying a leisurely weekend brunch, Instant Rice Idli is the perfect companion for any occasion, ensuring you kickstart your day with something delicious yet effortless.
Why Is Instant Rice Idli: Quick, Healthy Breakfast Magic You’ll Love So Irresistibly Good?
Quick and easy to prepare, this recipe takes just 25 minutes from start to finish, making it perfect for busy mornings. Flavorful and nutritious, the combination of rice flour and yogurt provides a delightful taste while packing in essential nutrients. Versatile option allows you to customize with your favorite vegetables, like carrots or peas, for added crunch and color. Crowd-pleaser that appeals to both kids and adults, this dish is sure to become a family favorite. Plus, it’s a great way to kickstart your day on a healthy note!
Instant Rice Idli: Quick, Healthy Breakfast Magic You’ll Love Ingredients
- For the Batter
- 1 cup rice flour – This is the base for your idlis, providing a lovely texture and taste.
- 1 cup yogurt – Adds a tangy flavor and helps in fermentation for fluffiness.
- 1 cup water – Adjusts the batter consistency to ensure perfect steaming.
- 1 teaspoon salt – Enhances the overall flavor of your idlis.
- 1 teaspoon baking soda – Aids in rising, giving your idlis that light and airy quality.
- For the Optional Ingredients
- 1 tablespoon oil (for greasing) – Keeps the idlis from sticking to the steamer or mold.
- 1/2 cup chopped vegetables (like carrots or peas) – Adds nutrition and color, making your instant rice idli even more delightful.
Directions: Instant Rice Idli: Quick, Healthy Breakfast Magic You’ll Love
1. Combine Ingredients: In a mixing bowl, combine 1 cup rice flour, 1 cup yogurt, 1 cup water, 1 teaspoon salt, and 1 teaspoon baking soda. Stir until you achieve a smooth batter that feels light and creamy.
2. Grease Molds: Generously grease the idli molds with 1 tablespoon oil to ensure easy removal later. If you’re adding a pop of color and nutrition, mix in 1/2 cup chopped vegetables like carrots or peas into the batter for added flavor.
3. Steam Idlis: Pour the prepared batter into the greased idli molds. Steam them for about 10-15 minutes on medium-high heat until they appear fluffy and a toothpick inserted comes out clean.
4. Serve Warm: Carefully remove the idlis from the molds while they’re hot. Serve them immediately with your favorite chutney or sambar for a delightful breakfast experience!
Optional: For an extra touch, garnish with fresh coriander leaves before serving.
Exact quantities are listed in the recipe card below.
Expert Tips
- Batter Consistency: Ensure your batter is smooth and not too thick; it should flow easily into the molds for perfect Instant Rice Idli: Quick, Healthy Breakfast Magic You’ll Love.
- Steaming Time: Keep an eye on the steaming process; overcooking can make idlis dry. Aim for 10-15 minutes for soft, fluffy results.
- Vegetable Mixing: If adding veggies, chop them finely and mix them in well to avoid uneven cooking. This adds flavor and nutrition without compromising texture.
- Greasing Molds: Don’t skip greasing the idli molds well with oil; this prevents sticking and makes removal a breeze, ensuring a beautiful presentation.
- Cooling Tips: Allow idlis to cool slightly before removing from molds. This helps them set and retain their shape better when served hot with chutney or sambar.
How to Store and Freeze Instant Rice Idli: Quick, Healthy Breakfast Magic You’ll Love

- Fridge: Store leftover Instant Rice Idli in an airtight container for up to 3 days. Keep them fresh and soft by placing a damp paper towel on top before sealing.
- Freezer: For longer storage, freeze the cooked idlis in a single layer on a baking sheet. Once frozen solid, transfer them to a freezer bag for up to 1 month.
- Reheating: To enjoy your idlis again, simply steam them for about 5 minutes or microwave with a splash of water covered with a damp paper towel until warmed through.
- Fresh Vegetables: If you added vegetables, consume within 2 days for optimal freshness. Ensure any perishables are properly stored to maintain flavor and quality.
Instant Rice Idli: Quick, Healthy Breakfast Magic You’ll Love Variations
Feel free to explore these delightful twists that will elevate your breakfast experience and cater to your taste buds!
- Vegetable-Packed: Add 1/2 cup of finely chopped spinach or bell peppers for a burst of color and nutrients. These veggies not only enhance the flavor but also make your idlis visually appealing.
- Spicy Kick: Incorporate 1 teaspoon of finely chopped green chilies for a zesty surprise. This addition brings a lovely heat that awakens the senses with each bite.
- Herb Infusion: Mix in 1 tablespoon of chopped fresh coriander or mint for an aromatic touch. The herbs add freshness and a delightful fragrance that makes breakfast even more inviting.
- Nutty Delight: Stir in 1/4 cup of ground flaxseed or chia seeds for added crunch and nutrition. These seeds introduce a wonderful texture while also boosting the health benefits of your idlis.
- Cheesy Goodness: Fold in 1/2 cup of grated cheese, such as cheddar or paneer, for creamy richness. The melted cheese creates an indulgent experience that will have your family asking for seconds.
- Coconut Twist: Add 1/4 cup of shredded coconut to give your idlis a subtle sweetness and tropical flair. This twist adds an interesting texture and pairs beautifully with chutney.
- Sweet Variation: For a sweeter option, mix in 2 tablespoons of jaggery powder instead of salt. This creates a unique treat that can be enjoyed with honey or syrup on the side.
- Savory Oats: Substitute half the rice flour with oat flour for extra fiber and flavor. Oats provide a delightful nuttiness that balances perfectly with the yogurt base.
Make Ahead Options
If you’re looking for a meal prep-friendly option, Instant Rice Idli: Quick, Healthy Breakfast Magic You’ll Love is perfect for your busy mornings. You can prepare the batter ahead of time by mixing together 1 cup of rice flour, 1 cup of yogurt, 1 cup of water, 1 teaspoon of salt, and 1 teaspoon of baking soda in a mixing bowl. This batter can be made up to 24 hours in advance and stored in the refrigerator. Additionally, you can chop your vegetables—like carrots or peas—up to 3 days beforehand and store them in an airtight container. When you’re ready to enjoy your idlis, simply grease your molds with oil, mix the veggies into the batter if using, pour it into the molds, and steam for about 10-15 minutes until they’re fluffy and cooked through. Serve hot with your favorite chutney or sambar for a delightful breakfast!
Instant Rice Idli: Quick, Healthy Breakfast Magic You’ll Love Recipe FAQs
What type of rice flour should I use for the batter?
You can use any finely ground rice flour for this recipe, but if you have access to South Indian idli rice flour, it’s ideal! It creates a lighter texture. Just ensure the flour is fresh and not clumpy for the best results.
Can I substitute yogurt with anything else?
Absolutely! If you’re looking for a dairy-free option, try using coconut yogurt or almond yogurt. They will provide a similar tangy flavor and moisture. Just keep in mind that this might slightly alter the taste and texture of your idlis.
How long can I store leftover idlis?
Leftover idlis can be stored in an airtight container in the refrigerator for up to 2 days. When ready to enjoy them again, just steam them lightly for about 5 minutes to warm through, ensuring they retain their soft texture.
Is it possible to freeze cooked idlis?
Yes, you can freeze cooked idlis! Let them cool completely, then place them in a single layer on a baking sheet until frozen solid. Transfer them to a freezer bag or container for up to 1 month. To reheat, just steam for about 10 minutes from frozen.
What vegetables work best in the batter?
Chopped carrots and peas are fantastic options due to their sweetness and color. You could also consider adding finely chopped spinach or bell peppers for added nutrition and flavor. Just remember not to overload the batter – about 1/2 cup is perfect!
How should I serve instant rice idlis?
These fluffy delights are best enjoyed hot! Serve them with your favorite chutney or sambar on the side. The contrast between the savory dip and the soft idlis is simply heavenly, making breakfast feel like a warm hug!
Ingredients
Method
- In a mixing bowl, combine rice flour, yogurt, water, salt, and baking soda. Mix well to form a smooth batter.
- Grease the idli molds with oil. If using vegetables, mix them into the batter.
- Pour the batter into the idli molds and steam for about 10-15 minutes until cooked through.
- Remove the idlis from the molds and serve hot with chutney or sambar.