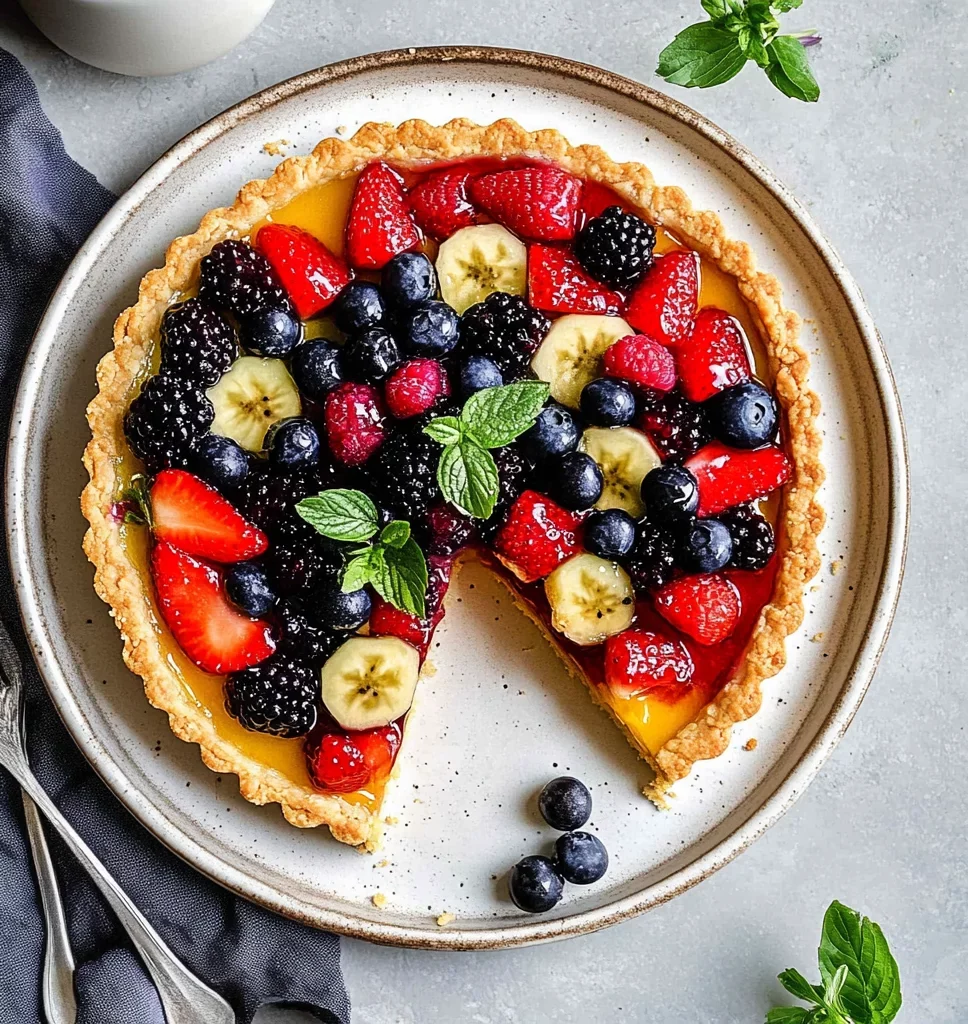
Imagine biting into a vibrant Gluten-Free Fruit Tart, where the sweet, sticky glaze glistens like morning dew on a sunny day. The buttery crust crumbles just right, giving way to a creamy layer that perfectly balances the tangy burst of fresh fruits—strawberries, kiwis, and blueberries—that dance on your palate, making every forkful a celebration of flavors.
This delightful dessert has been a staple at our family gatherings, evoking laughter and stories as we gather around the table. Whether it’s a summer barbecue or a festive holiday feast, this Gluten-Free Fruit Tart brings everyone together with its colorful charm and irresistible taste, promising an unforgettable treat that leaves you craving more.
Why Is Gluten-Free Fruit Tart So Irresistibly Good?
Delightfully unique, this Gluten-Free Fruit Tart features a luscious almond flour crust that’s both crunchy and satisfying. Quick to prepare, it requires no baking, making it ideal for last-minute gatherings. Naturally sweetened with honey and maple syrup, every bite bursts with freshness from vibrant fruits like berries and mango. Versatile enough for any occasion, this tart is sure to impress family and friends while keeping dessert light and refreshing!
Gluten-Free Fruit Tart Ingredients
For the Crust
- 1 cup almond flour – This nutty flour provides a delightful base, making your tart gluten-free and rich in flavor.
- 2 tablespoons coconut oil (melted) – Coconut oil adds a subtle tropical essence and helps bind the crust together beautifully.
- 2 tablespoons honey – A natural sweetener that enhances the crust’s flavor while keeping it moist and delicious.
- 1 pinch salt – Just a hint to elevate the sweetness and balance the flavors in your tart crust.
For the Filling
- 1 cup coconut cream (chilled) – This creamy base creates a luscious filling that’s dairy-free and oh-so-satisfying.
- 2 tablespoons maple syrup – Adding a touch of warmth, this syrup complements the coconut cream perfectly for a sweet finish.
- 1 teaspoon vanilla extract – A dash of vanilla infuses the filling with aromatic notes, enhancing its overall taste.
For the Toppings
- 1 cup mixed fresh fruits (such as berries, kiwi, and mango) – These vibrant fruits not only add color but also provide a refreshing burst of flavor to your Gluten-Free Fruit Tart.
Step-by-Step Gluten-Free Fruit Tart
1. Mix the crust: In a bowl, blend 1 cup almond flour, 2 tablespoons melted coconut oil, 2 tablespoons honey, and a pinch of salt until everything is well combined. The mixture should feel slightly sticky yet cohesive.
2. Press into tart pan: Firmly press the crust mixture into the bottom and up the sides of a tart pan, creating an even layer. This forms the delightful foundation for your dessert.
3. Chill to set: Refrigerate the crust for 15 minutes to allow it to firm up. This cooling period helps the tart maintain its shape when filled.
For the Filling:
4. Combine ingredients: In a mixing bowl, whisk together 1 cup chilled coconut cream, 2 tablespoons maple syrup, and 1 teaspoon vanilla extract until smooth and creamy. The mixture should be light and airy, perfect for spreading.
5. Whip until fluffy: Beat the filling mixture until it achieves a silky texture, taking care not to overmix. This will provide a lovely contrast to the crunchy crust.
Assemble the tart:
6. Spread the filling: Gently spread the whipped coconut cream filling over your chilled crust, ensuring an even layer that fills every nook and cranny.
7. Top with fruits: Artfully arrange 1 cup of mixed fresh fruits like berries, kiwi, and mango on top of your tart for a vibrant splash of color and natural sweetness.
8. Chill before serving: Place the assembled tart in the refrigerator for an additional 10 minutes before serving, allowing flavors to meld beautifully.
Optional: Garnish with mint leaves for an extra touch of freshness!
Exact quantities are listed in the recipe card below.
Pro Tips for Gluten-Free Fruit Tart
- Almond Flour Choice: Use finely ground almond flour for a smoother crust that holds together better and avoids grittiness.
- Coconut Oil Temperature: Ensure coconut oil is melted but not hot. Hot oil can make the crust too greasy, affecting its texture.
- Chill Time Matters: Don’t skip the chilling time after pressing the crust; it helps set properly and prevents crumbling when serving your Gluten-Free Fruit Tart.
- Cream Consistency: Make sure the coconut cream is well-chilled before whipping. This ensures a fluffy filling that holds its shape beautifully.
- Fruit Freshness: Select ripe, fresh fruits for topping to enhance flavor and visual appeal. Avoid overly soft or bruised fruits for best results.
- Serving Tip: Always serve your tart chilled, as this keeps the filling firm and refreshing, making it an ideal light dessert!
How to Store and Freeze Gluten-Free Fruit Tart
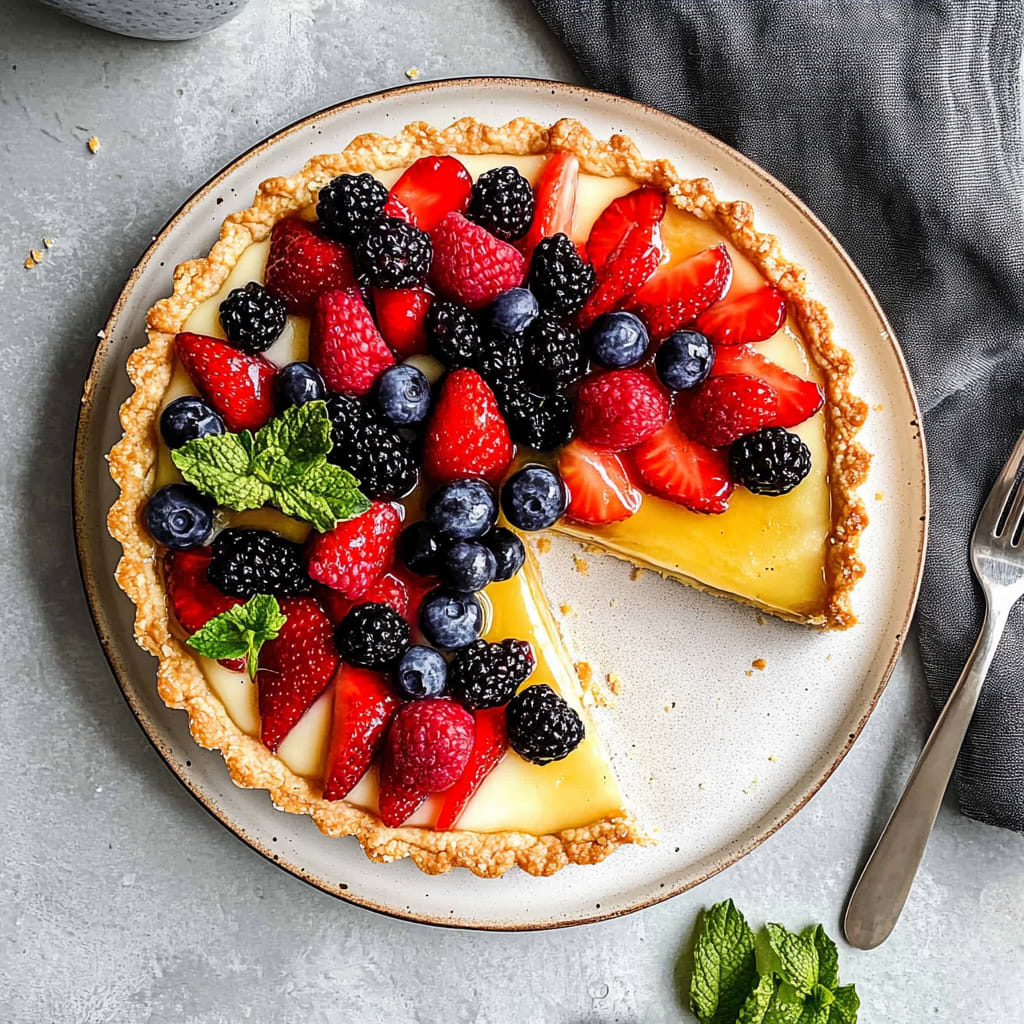
- Fridge: Store the Gluten-Free Fruit Tart in an airtight container for up to 3 days to keep the crust fresh and prevent the fruits from wilting.
- Freezer: If you want to enjoy your tart later, wrap it tightly in plastic wrap and then foil. It can be frozen for up to 1 month; thaw in the fridge before serving.
- Fruits: Since fresh fruits can spoil quickly, it’s best to add them just before serving. This keeps your tart looking vibrant and delicious!
- Reheating: Enjoy your tart chilled or at room temperature. Avoid reheating as it may alter the texture of the crust and filling.
Gluten-Free Fruit Tart Your Way
Feel free to unleash your creativity with this vibrant tart and make it uniquely yours!
- Nut-Free: Substitute almond flour with sunflower seed flour for a nut-free crust that’s equally delicious. The slight earthiness of sunflower seeds adds a lovely twist.
- Vegan: Replace honey with agave syrup and use a plant-based whipped cream for the filling. This ensures everyone can enjoy the delightful flavors without compromising on taste.
- Cocoa Kick: Mix in 2 tablespoons of cocoa powder into the almond flour for a chocolatey crust. It adds an indulgent depth that pairs beautifully with fresh fruit.
- Zesty Twist: Add the zest of one lemon or lime to the coconut cream filling for a refreshing citrus lift. This brightens the overall flavor, making each bite burst with sunshine.
- Creamy Delight: Swap coconut cream with Greek yogurt for a tangy and creamy filling. This variation offers a slightly different texture while still being delightful with fresh fruits.
- Berry Boost: Incorporate pureed strawberries or raspberries into the coconut cream for a pink-hued filling that’s both visually appealing and fruity. It’s an invitation to savor every spoonful!
- Spicy Surprise: Add a pinch of cayenne pepper to the fruit topping for an unexpected kick. This playful heat beautifully contrasts the sweet fruits, creating an exciting flavor experience.
- Crunchy Addition: Top with toasted coconut flakes or chopped nuts for an added crunch. This textural contrast makes each bite more satisfying and enjoyable!
Make Ahead Options
This Gluten-Free Fruit Tart is not only a delightful treat but also perfect for meal prep, allowing you to enjoy a light dessert with minimal last-minute effort. You can prepare the crust using 1 cup of almond flour, 2 tablespoons of melted coconut oil, 2 tablespoons of honey, and a pinch of salt ahead of time—just mix these ingredients in a bowl, press into your tart pan, and refrigerate for 15 minutes to set. The filling can be made up to 3 days in advance; simply whip together 1 cup of chilled coconut cream, 2 tablespoons of maple syrup, and 1 teaspoon of vanilla extract until smooth and creamy. When you’re ready to serve, just spread the filling over the chilled crust, top with your prepped mixed fresh fruits like berries, kiwi, and mango, and chill for an additional 10 minutes. This way, you’ll save time while still presenting a stunning and delicious Gluten-Free Fruit Tart!
Gluten-Free Fruit Tart Questions Answered
What type of almond flour should I use for the crust?
It’s best to use finely ground almond flour for a smooth and crumbly crust. Avoid using almond meal, as it has a coarser texture that can result in a less delicate tart. If you’re looking for alternatives, you could try using ground sunflower seeds or cashew flour, but keep in mind that this may alter the flavor slightly.
How should I store the gluten-free fruit tart?
To keep your fruit tart fresh, store it in an airtight container in the refrigerator. It will stay good for up to 3 days. Just be careful with the fruit toppings; if they are very juicy, they might make the crust soggy over time. If you notice this happening, you can place the tart on a paper towel before sealing it for storage.
Can I freeze the gluten-free fruit tart?
Absolutely! You can freeze the assembled tart for up to one month. Just wrap it tightly in plastic wrap and then aluminum foil to prevent freezer burn. When you’re ready to enjoy it, thaw it in the refrigerator overnight before serving. However, it’s best to freeze it without fresh fruit on top to maintain their texture.
What if my coconut cream is too hard to whip?
If your coconut cream is too firm after chilling, simply let it sit at room temperature for about 10-15 minutes until it softens slightly. You can also add a splash of coconut milk or water to help achieve a smoother consistency while whipping. This will ensure your filling is creamy and easy to spread.
How do I choose the right fruits for topping?
When selecting fruits for your tart, go for a mix of colors and textures! Fresh berries like strawberries and blueberries pair beautifully with tropical fruits such as kiwi and mango. Aim for about 1 cup of mixed fruits—this will give each slice a vibrant appearance and delicious variety. Make sure they are ripe but firm so they hold their shape on the tart.
What is the serving size for this gluten-free fruit tart?
This recipe yields four delightful servings, each packed with approximately 250 calories. Perfectly sized for sharing after a meal or enjoying as a light snack! If you have more guests or just want to indulge yourself, feel free to double the recipe; just remember that prep time remains around 30 minutes regardless of quantity!